We finally finished Ryder’s Bedroom over the weekend!
I’m so happy because with this new baby coming in less than 7 weeks, I was starting to feel like I was way in over my head when I thought about remodeling 3 different kids rooms! (really not sure what I was thinking a few months ago)
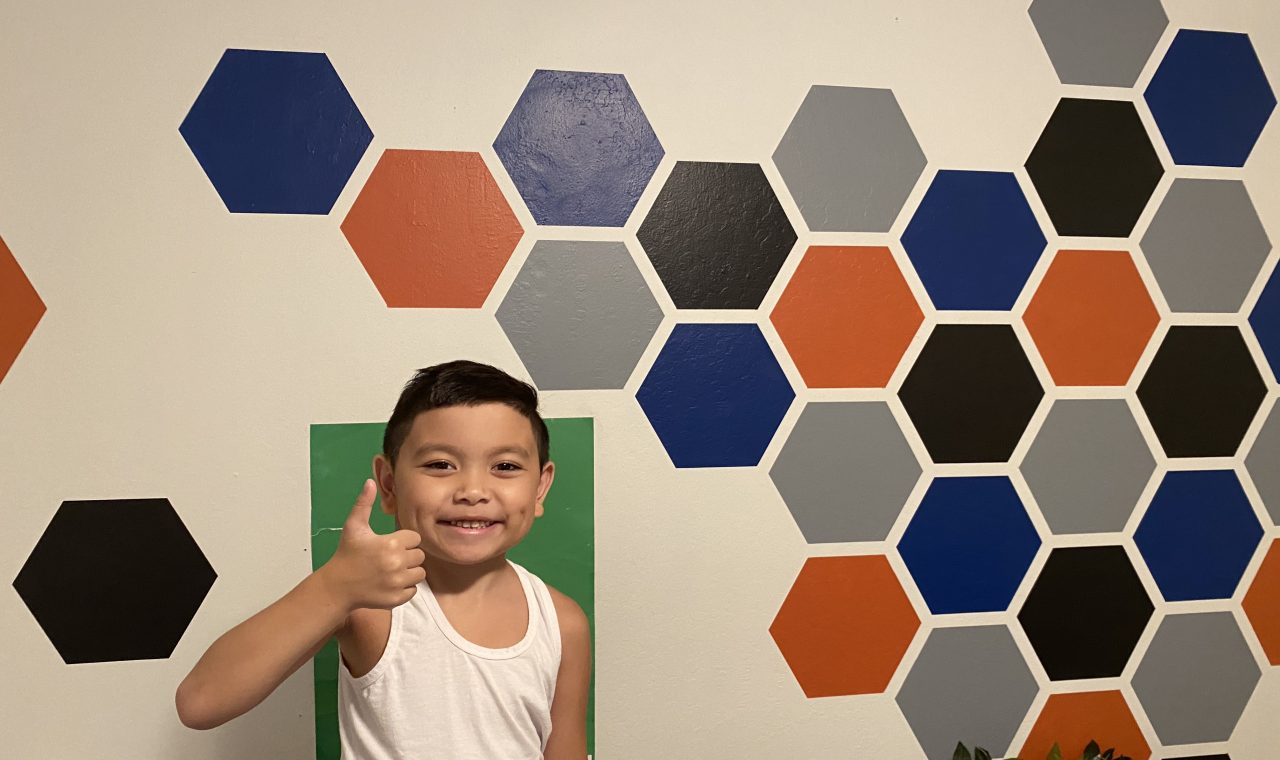
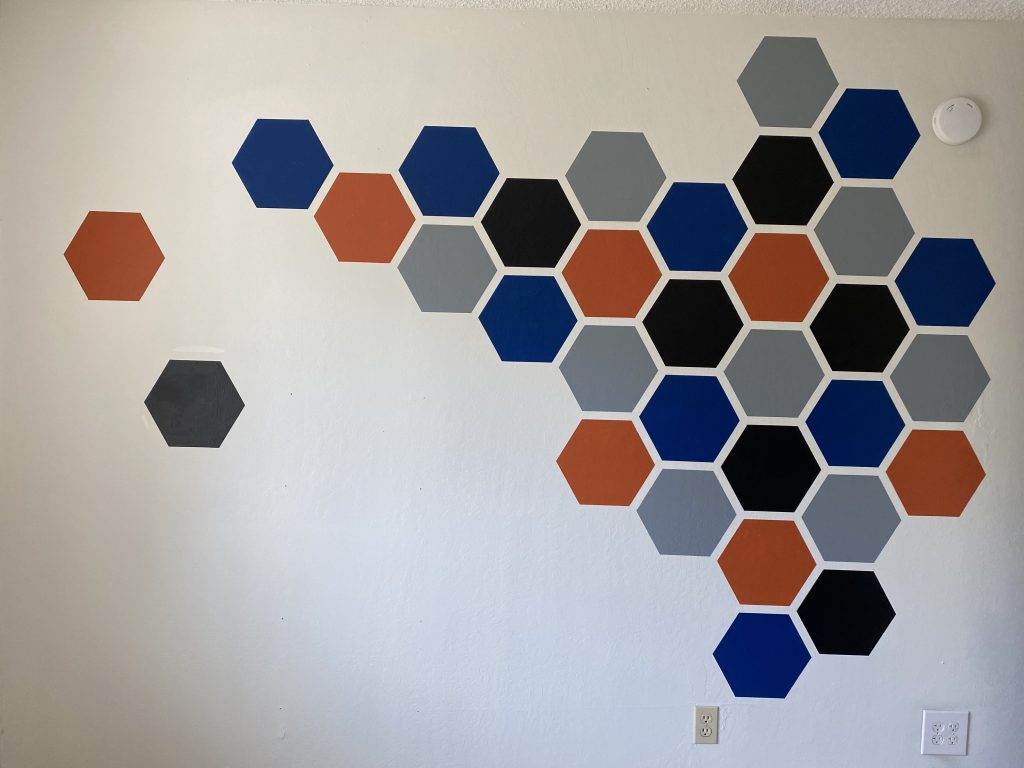
After searching all over Pinterest, Ryder finally decided on a hexagon accent wall! We found this pin online for inspiration! Ryder even loved the colors so much that he didn’t even want to switch it up.
First things first: I needed a hexagon stencil! I preferably wanted huge hexagons like the inspiration we found online, but I just couldn’t find anything! I even tried making a stencil myself, but I’m a huge perfectionist and I just couldn’t get the hexagon to look how I wanted it to. Then I remembered…duh – I have a Cricut Maker! I logged into the Cricut Design Studio, chose a hexagon shape and made it as large as I could on a 12×12 cutting sheet. I do wish I could have had a bigger hexagon, but this size was good enough (think: the bigger they are, the less you have to paint!)
Once I had my shape cut out, I was able to start taping on the wall. I just chose some random spot and started taping away.


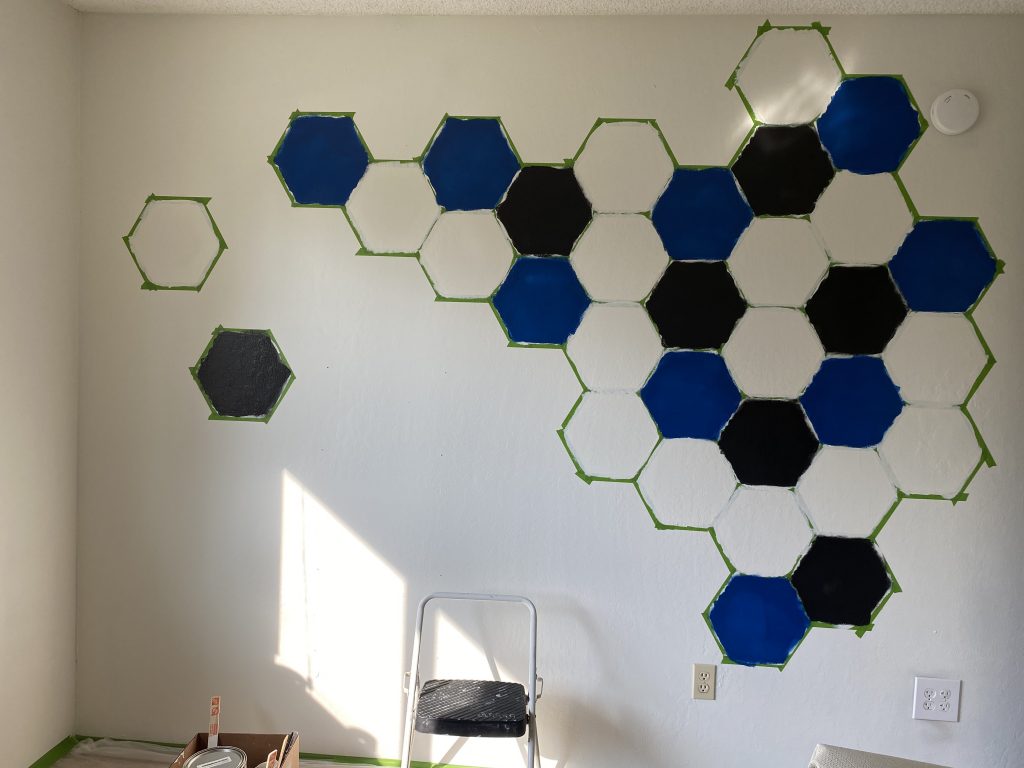
I’m not sure if you guys read my blog post last month on Shayla’s New Bedroom, but I mentioned having to go in-between the white lines for 7 hours because the paint bled thru way too much (we have textured walls). That was my biggest worry this time around so I researched some ways to avoid this. I found a tip that said before you start painting, you should paint over the tape with white (or whatever color your lines are). This will prevent bleeding of the colored paint. I figured why not? It was worth a shot.

Once that was done, I made a quick mock-up on my phone so I knew where each color would go.
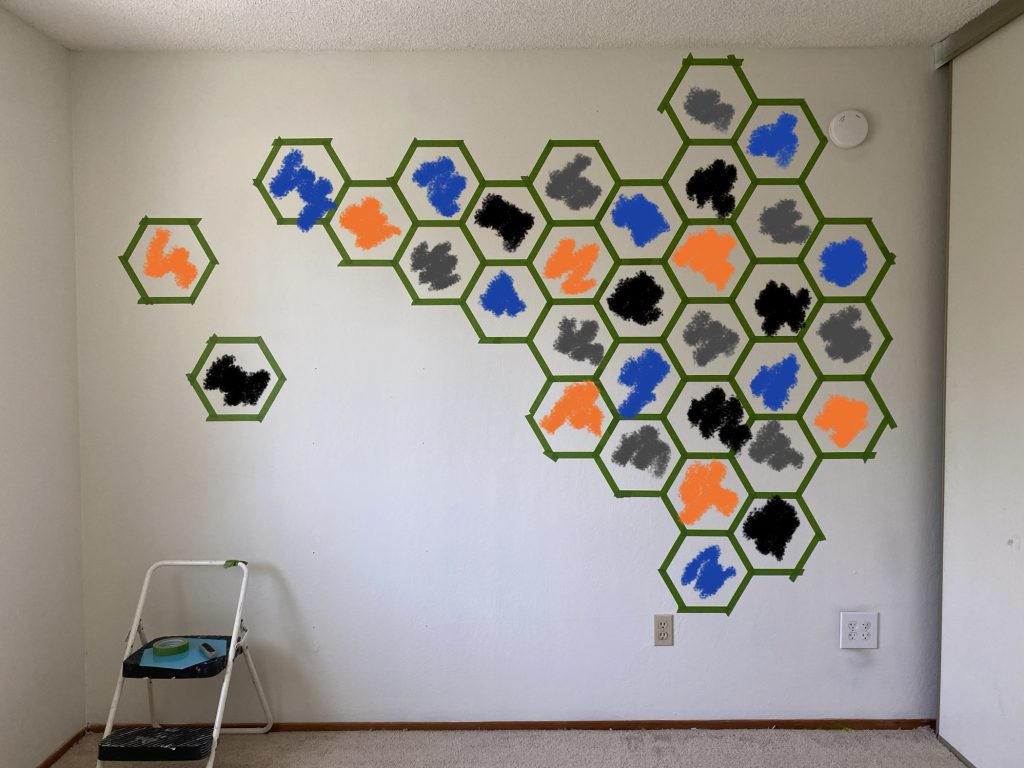
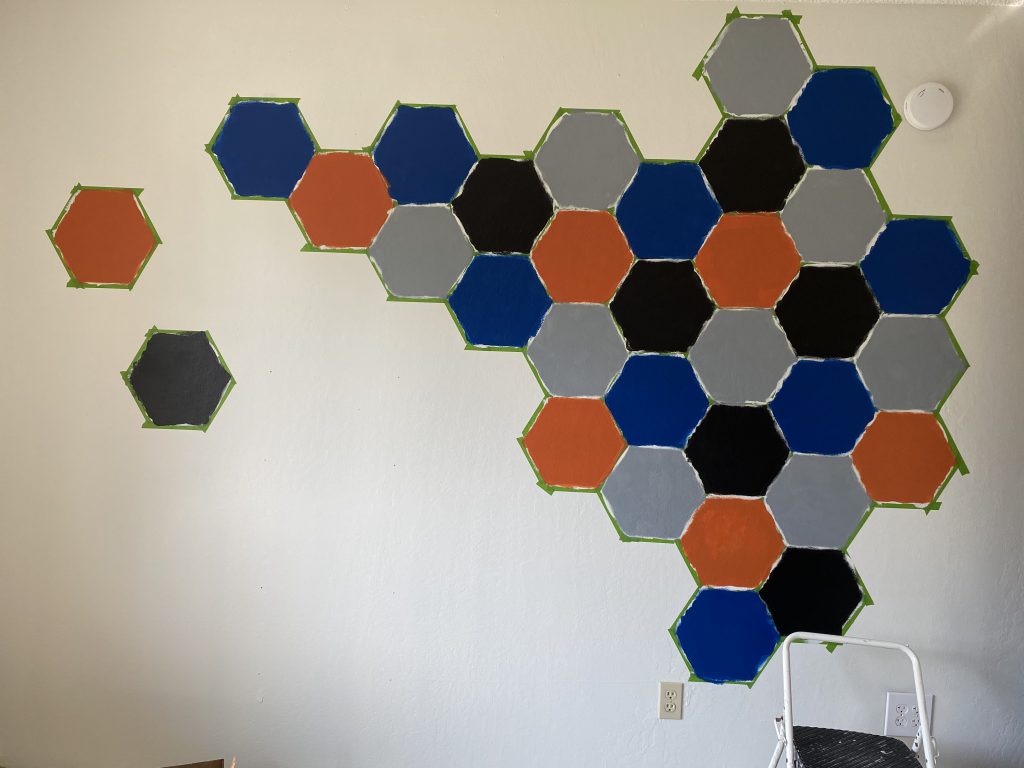
I started with the darker colors. I did this because I knew the darker colors always need a few extra layers and I just wanted to get them out of the way.
First, blue:

Then, black:
Then, orange:

Finally, gray:
Once it was all said and done…it was time for the moment of truth and remove the tape!


AND OH MY GOD GUYS, NO BLEEDING!!! I was so happy I took the time to go in and paint over the tape with white in the beginning. That literally saved me another 7 hours of having to go in with a fine paint brush. We were able to put all of his furniture back right away and have Ryder sleeping back in his room that same night!
Here’s the final product:

Leave a Comment
You must be logged in to post a comment.